The outcome
The Project
After following this guide and playing around with OpenCV, I decided I wanted to take it a step further. So I thought “What if I could make it track my face?”.
Getting Started
The first thing that came to mind was to use a servo to turn the camera back and forth. In order to get that servo to work, I was going to need something to send it a signal, and something to power it.
Obviously I have experience with a Raspberry Pi, So I instantly pulled that out of the electronics graveyard I have. Booted it up and started updating it. This poor thing was still using Python 2.
Powering the servo
Now that I had my Raspberry Pi up and running, it was time to figure out how I was going to power this servo. After looking up the specs and finding I needed 4-6 volts I tried thinking of a few ways to get that. I could’ve just strapped a couple batteries together and called it good, but I wanted something that was more permanent.
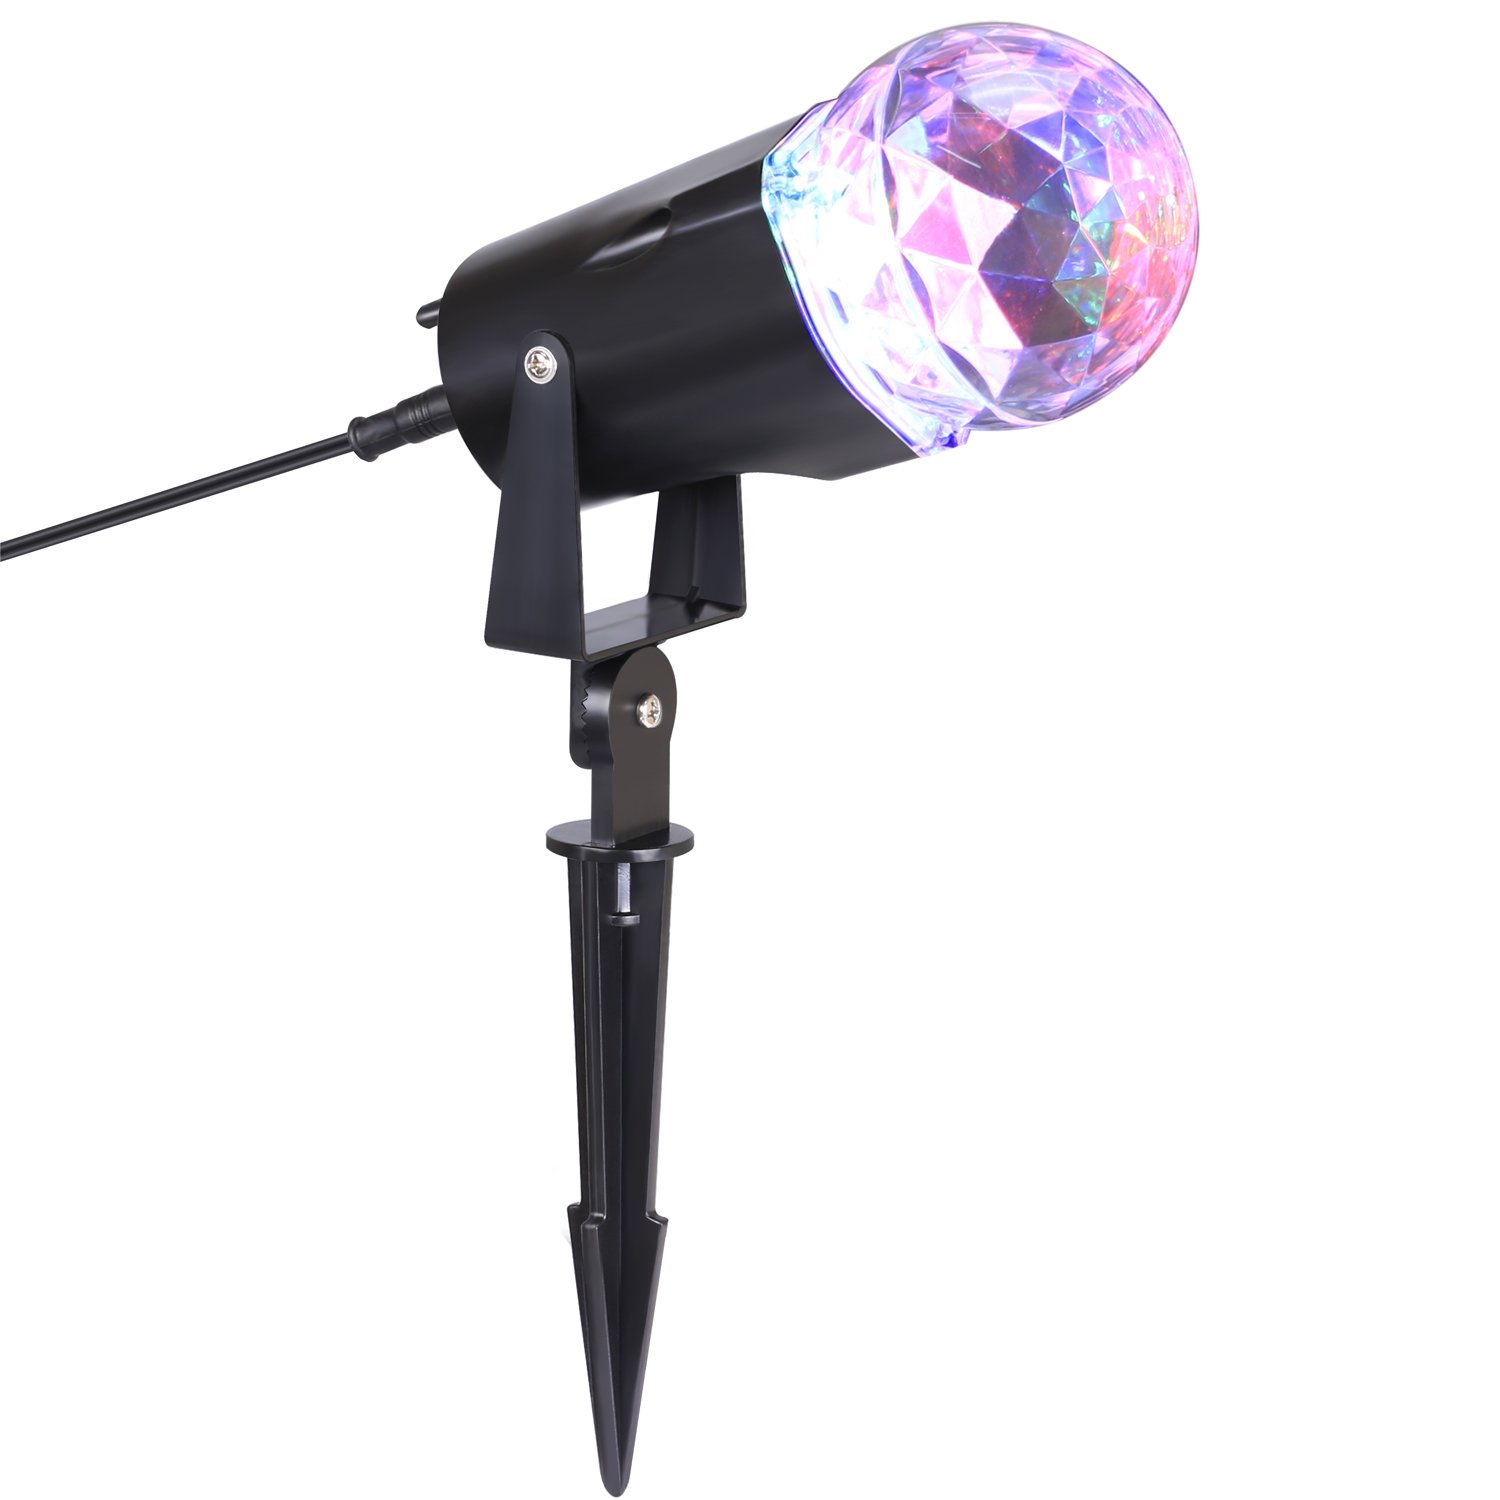
I started looking around my room for something that took 120V from the wall and converted it to DC. However I couldn’t just take one of the power adapters from one of my monitors. Then I noticed this Halloween decoration that has been sitting in my closet for two years. It plugs into the wall, and has LED’s, there’s no way that doesn’t convert AC to DC!
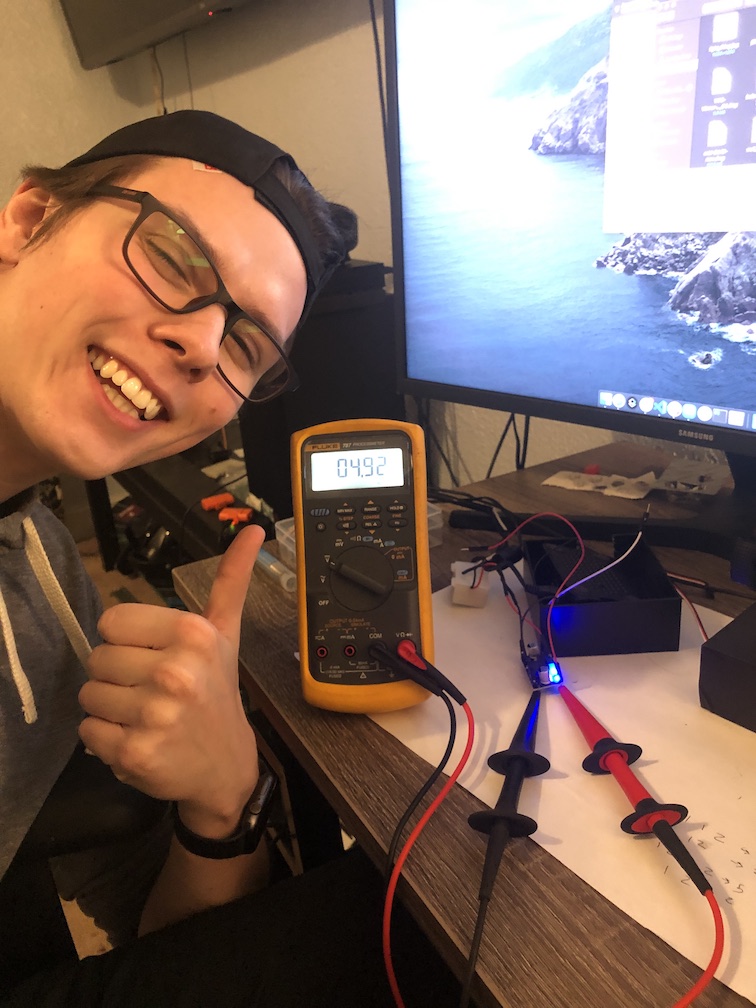
After tearing it apart I was able to get the peice I needed! After pulling out the digital multimeter, I was able to figure out that outputs 28V DC. That’s obviously way too much for my little servo.
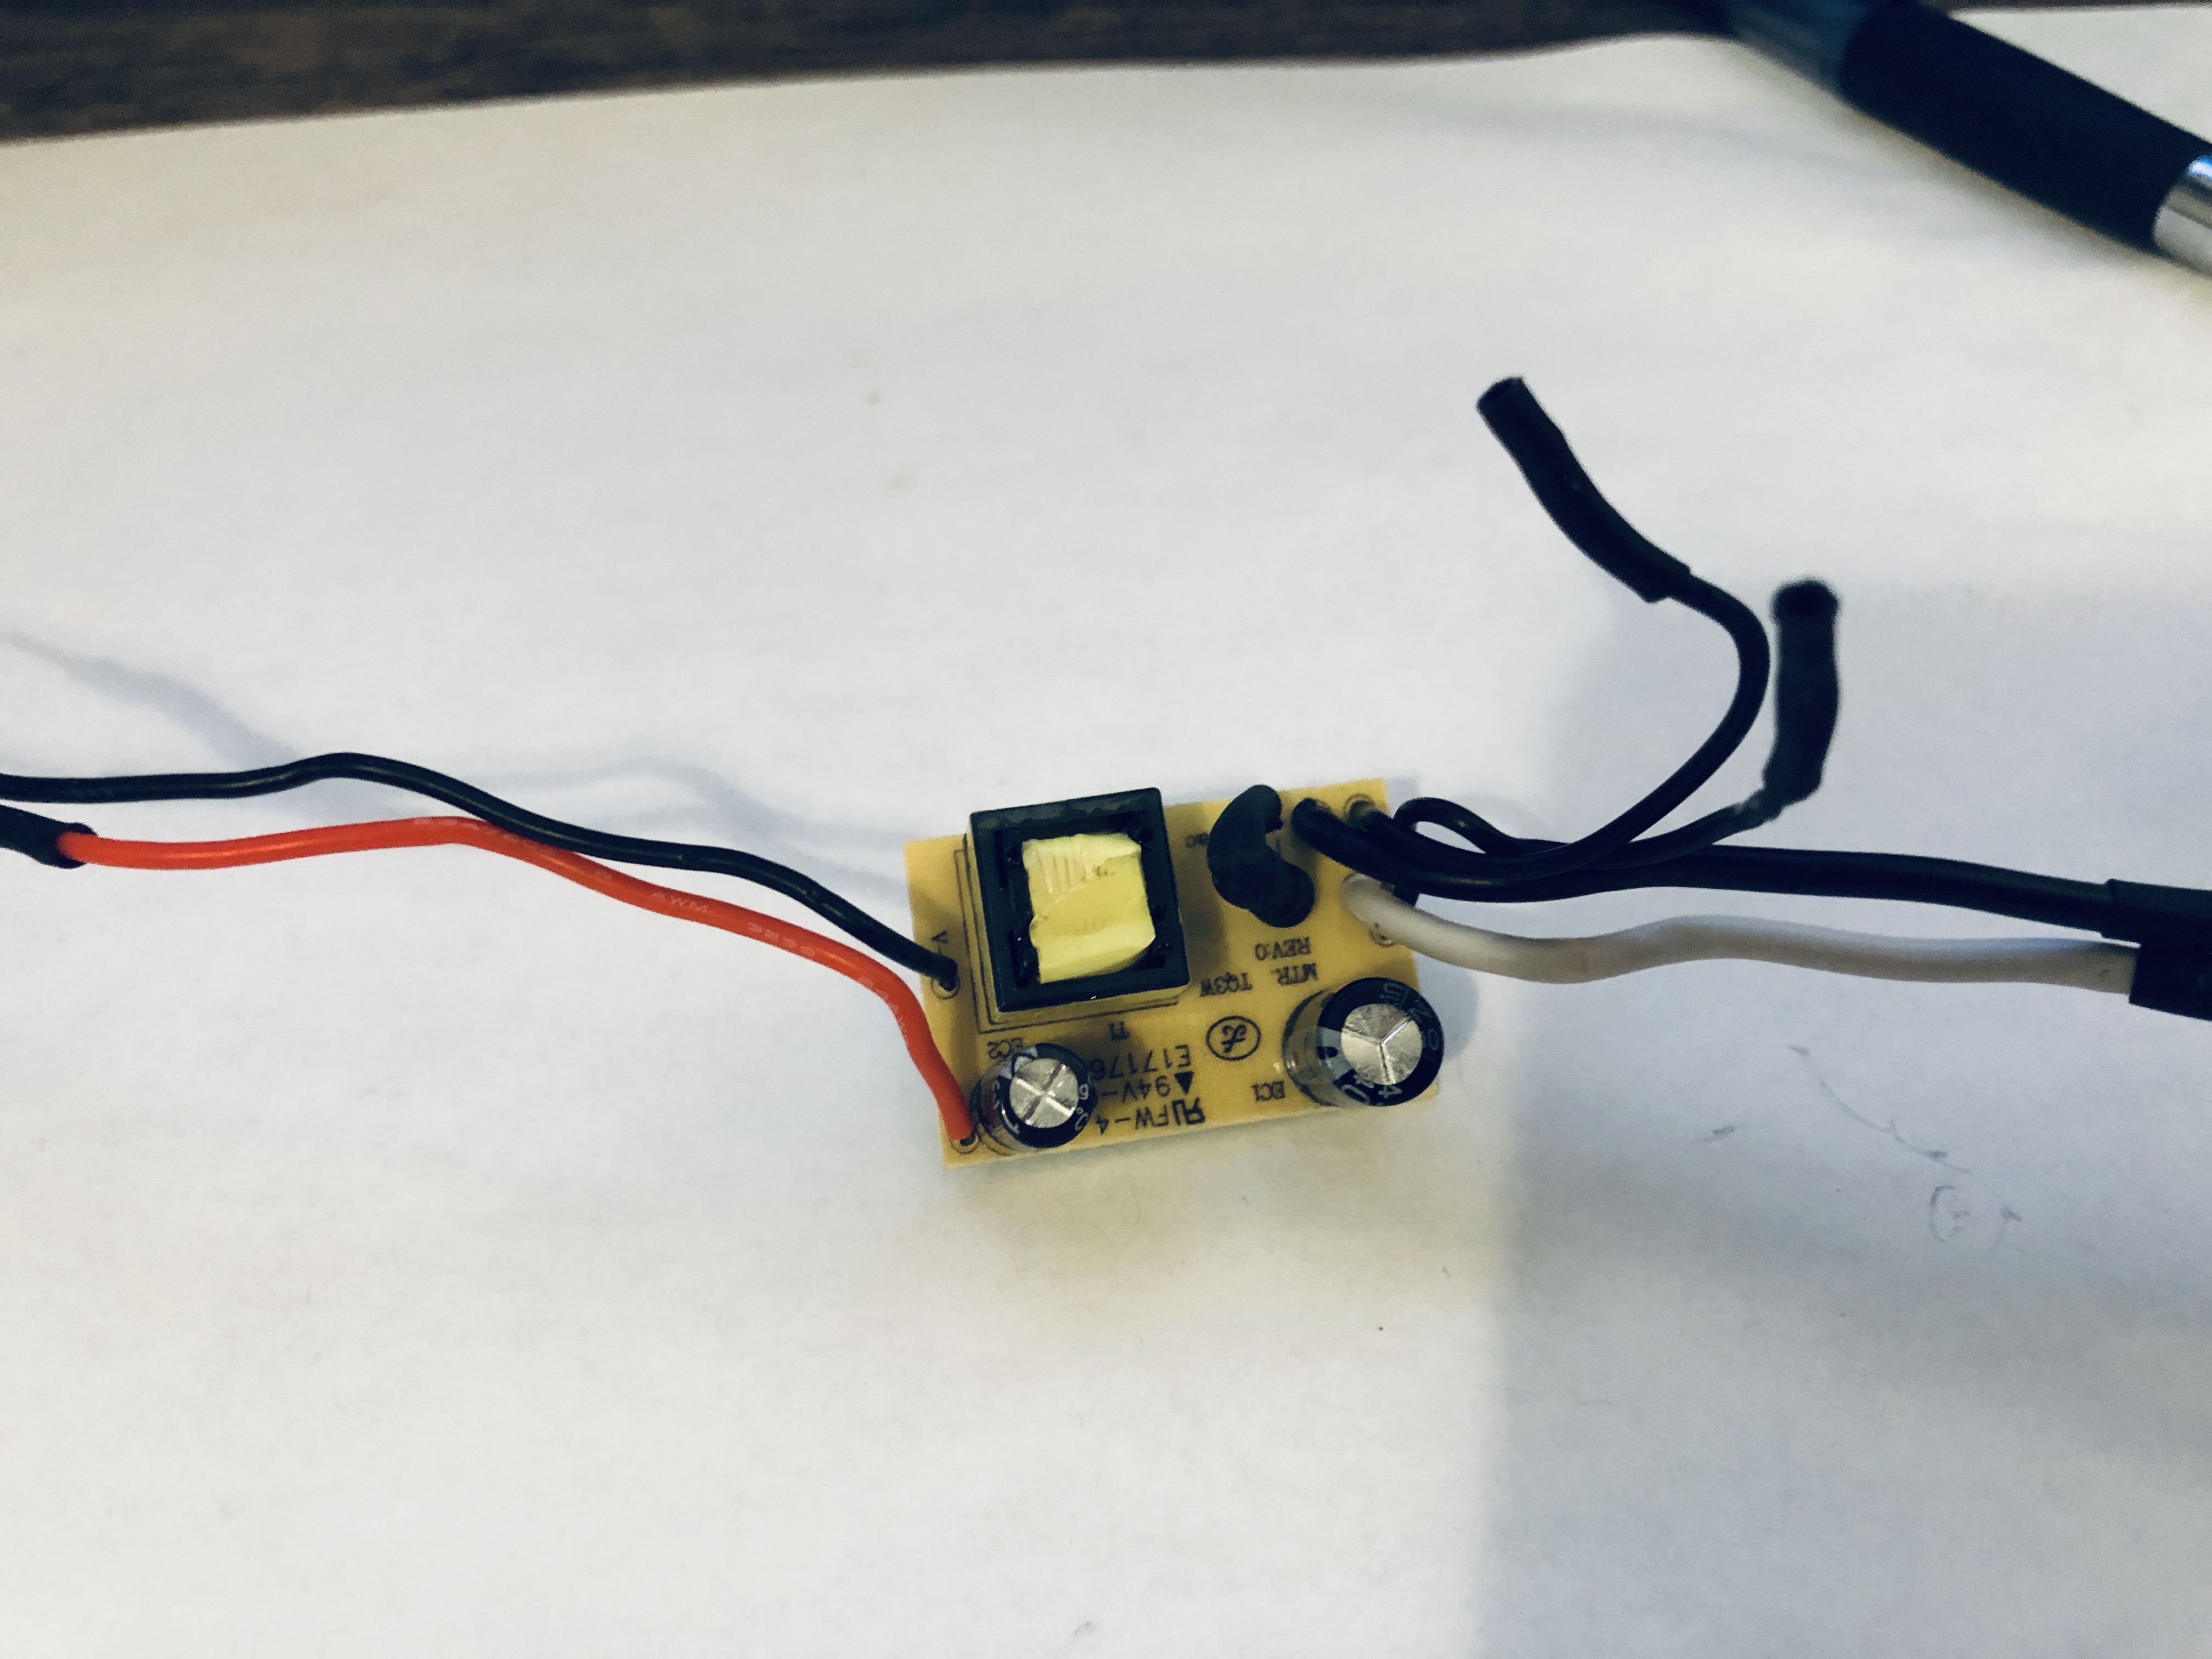
Now I needed to get a voltage regulator to step this down to about 5V. Unfortunetly I didn’t have one laying around. So, I got on Amazon and ordered 6 of them to be here the next day (You never know when you’re going to need more)
After a bit of soldering and some testing, I was able to get my 5V!
The Code
The code ended up being the most simple part of this project. The code consisted of using some libraries and a little bit of logic.
Here’s What I ended up doing:
import cv2
import pigpio

pi = pigpio.pi(host=<'raspberrypi IP'>)

cam_min = 550
cam_mid = 1425
cam_max = 2300

# Set camera to middle position
pi.set_servo_pulsewidth(12, cam_mid)
cam_position = cam_mid

cascPath = 'haarcascade_frontalface_default.xml'
faceCascade = cv2.CascadeClassifier(cascPath)

video_capture = cv2.VideoCapture(0)

while True:
    # Capture frame-by-frame
    ret, frame = video_capture.read()
    width = int(video_capture.get(3))
    height = int(video_capture.get(4))

    gray = cv2.cvtColor(frame, cv2.COLOR_BGR2GRAY)

    faces = faceCascade.detectMultiScale(
        gray,
        scaleFactor=1.3,
        minNeighbors=8,
        minSize=(100, 100),
        flags=cv2.CASCADE_SCALE_IMAGE
    )

    face_x = None

    # Draw a rectangle around the faces
    for (x, y, w, h) in faces:
        cv2.rectangle(frame, (x, y), (x+w, y+h), (0, 255, 0), 2)
        face_x = x

    # Create a boundary of where we want the face
    cv2.rectangle(frame, (850, 0), (width-850, height), (255, 0, 0), 2)

    # If face not in boundary, move camera to desired position
    if face_x != None:
        # move to right
        if face_x < 850:
            if cam_position > 550:
                cam_position += 9
                pi.set_servo_pulsewidth(12, cam_position)

        # move to left
        if face_x > width-850:
            if cam_position < 2300:
                cam_position -= 9
                pi.set_servo_pulsewidth(12, cam_position)


    # Display the resulting frame
    cv2.imshow('Video', frame)

    if cv2.waitKey(1) & 0xFF == ord('q'):
        break

# When everything is done, release the capture
video_capture.release()
cv2.destroyAllWindows()